
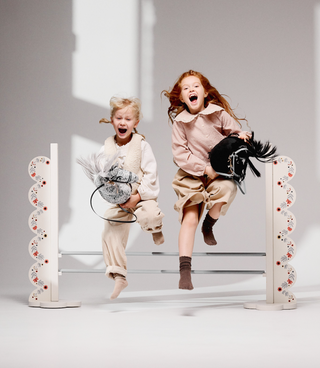
The best starting height for a hobby horse jump depends on current movement and confidence, not a fixed age table. A beginner should be able to see the pole, approach it calmly and cross it without a sudden stop. Repeated, controlled attempts are a better reason to progress than one unusually high jump.
This approach keeps the focus on rhythm, balance and enjoyment. It also makes one adjustable obstacle useful for many different games, from walking exercises to a more developed jumping course.
Why a low start is useful
A low pole lets the rider practise the complete movement. There is time to choose a straight approach, look ahead, organise the hobby horse stick and continue after landing. When the first setting feels intimidating, attention narrows to simply getting over the pole and the rest of the route becomes rushed.
Easy attempts are not wasted repetitions. They help make the approach predictable and give the rider a chance to notice where feet, hands and the hobby horse are during the jump. Lowering the pole after a difficult attempt is also a normal adjustment, not a failure.
Nilchi hobby horse jumps start at 20 cm and adjust to 90 cm in 10 cm steps. The available range offers progression, but there is no need to use every setting.
Why age alone does not provide the answer
Children of the same age can have different heights, experience, coordination and confidence. They may also be practising in completely different spaces. A rigid age-to-height rule ignores all of those factors.
Instead, observe whether the rider can approach without abrupt braking, keep the route under control after landing and stop at a marked point. They should also feel free to walk around the obstacle or ask for it to be lowered. A course works best when opting out of a jump is always simple.
If you are still selecting equipment, compare the adjustment system and dimensions in our guide to choosing a hobby horse jump.
A practical first session
Start by walking past the obstacle and around both sides. Then place the pole at the lowest comfortable setting and walk over it without jumping. This introduces the width of the structure and the position of the hobby horse.
Next, make several calm approaches from the same direction. Avoid timing the attempts. Ask the rider to continue for a few steps after crossing and stop at a visible marker. Once this sequence feels easy, repeat it from the other direction.
Only then introduce a small jump. Keep the route straight and avoid adding a turn immediately before the pole. The aim of the session is a recognisable pattern, not maximum height.
Signs that the height is appropriate
Keep the current setting when the rider:
- approaches at a steady pace;
- looks towards the route rather than only at the pole;
- crosses without a last-second stop;
- lands with enough control to continue;
- is willing to repeat the attempt without pressure.
No single sign needs to look perfect. What matters is that the overall movement is calm and repeatable.
When to lower the pole
Reduce the height when the rider repeatedly stops in front of the jump, twists away from the route, catches the pole with the hobby horse or loses control after landing. Tiredness, a new location and a more complicated course can all justify using a lower setting than usual.
Change one variable at a time. If the route now includes a turn or a second obstacle, keep the height familiar. If the pole moves up, leave the rest of the route simple. This makes the source of any difficulty easier to understand.
When to try the next setting
Consider moving up one adjustment step after several comfortable repetitions, not after the first successful attempt. Explain the change and allow the rider to return to the previous height immediately.
The next challenge does not always need to be higher. You can approach from the opposite direction, add a controlled stop after landing or connect two low jumps. These variations develop course skills without turning every session into a height competition.
Our article on building a hobby horse course includes three difficulty levels based on this one-change-at-a-time principle.
Use the adjustment system consistently
Place the pole at the same level on both uprights and follow the assembly instructions supplied with the product. Nilchi magnetic holders support the pole at the selected height and let it release when knocked. Wait until the course is clear before resetting it.
Check the equipment and the surface before every session. Indoors, remove loose items and slippery rugs. Outdoors, choose level ground and account for changing surface conditions.
Browse the Nilchi wooden hobby horse jumps to compare the available designs. All four models share the same 20–90 cm range, so the chosen artwork does not change the progression options.
The right height is the one that allows a rider to understand and control the whole movement. Start low, repeat the route and let consistent technique—not a number on its own—decide what comes next.